Sharp LL-T2010 Guía de usuario
Busca en linea o descarga Guía de usuario para Televisores y monitores Sharp LL-T2010. Sharp LL-T2010 User`s guide [en] Manual de usuario
- Pagina / 198
- Tabla de contenidos
- SOLUCIÓN DE PROBLEMAS
- MARCADORES

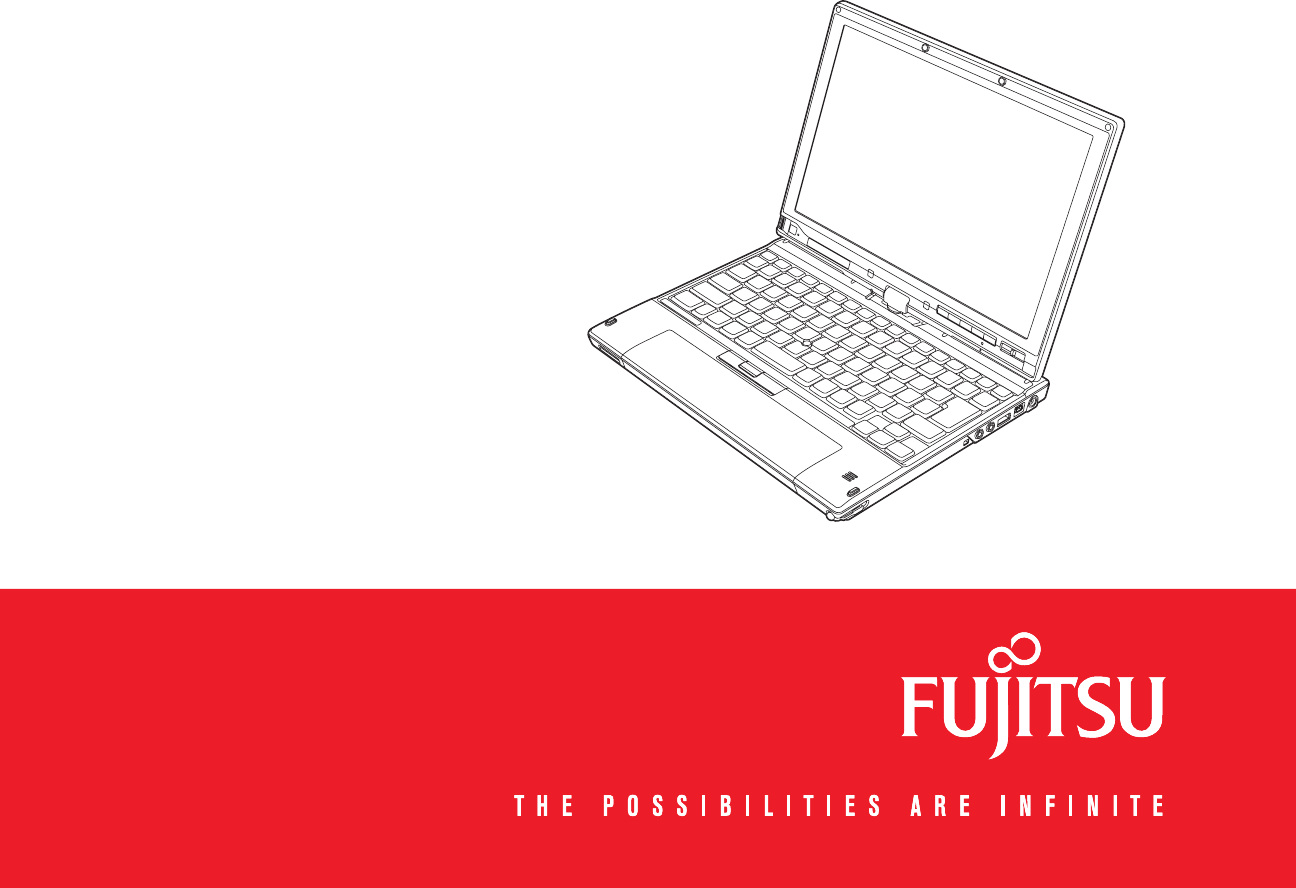
- User’s Guide 1
- ASH HANDS AFTER HANDLING 3
- RATING FUSE 4
- Recycling your battery 5
- Contents 6
- Preface 13
- Service and Support 14
- Fujitsu Shopping Online 15
- Limited Warranty 15
- Chapter 1 16
- Connection Notebook 17
- PC Card Slot 22
- PC Card Eject Button 22
- Smart Card Slot 23
- Air Vents 23
- Headphone Jack 24
- USB 2.0 Ports 24
- DC Power Jack 24
- IEEE 1394 (4-pin) Jack 25
- Microphone Jack 25
- Pen Tether Attachment Point 25
- Pen/Pen Holder 25
- Gigabit LAN (RJ-45) Jack 26
- Video Port” on page 92 27
- Battery Latches 28
- Lithium ion Battery Bay 28
- Memory Upgrade Compartment 29
- Port Replicator Connector 29
- Status Indicator Panel 30
- - Status Indicator Panel 31
- Display Panel 32
- - Display Panel 33
- Figure 9. Fully Open Display 34
- Figure 10. Rotating Display 34
- Figure 11. Tablet Mode 34
- Keyboard 36
- Numeric Keypad 37
- Windows Keys 37
- Cursor Keys 37
- Function Keys 38
- Left Button 39
- Right Button 39
- Scroll Button 39
- Quick Point Control 39
- WINDOWS CONTROL PANEL 40
- .SHOPFUJITSU.COM 42
- Volume Control 47
- <Enter>/<Escape> 49
- Screen Rotation 50
- Ctl+Alt+Del Button 53
- Setting Passwords 55
- DEFINED ABOVE 56
- Incorrect Password Entry 57
- APPLICATION 59
- Chapter 2 61
- Connecting the Power Adapters 62
- Power/Suspend/Resume Button 63
- Using the TrustedCore Menu 65
- BIOS Guide 66
- ClickMe! 69
- Windows XP Systems 70
- Power Management 71
- - Power Management 72
- Windows Vista: 73
- YOU START THE NEXT TIME 74
- Chapter 3 76
- STATUS INDICATOR PANEL 77
- Low Battery State 78
- - Lithium ion Battery 79
- OR CHARGE YOUR BATTERY 80
- Memory Stick 81
- PC Cards 83
- - PC Cards 84
- REMOVING THE CARD 85
- Memory Upgrade Module 86
- - Memory Upgrade Module 87
- CAPACITY 87
- Device Ports 89
- - Device Ports 90
- ADAPTER 91
- Chapter 4 94
- Audio Problems 97
- Port Replicator Problems 98
- Floppy Disk Drive Problems 99
- Hard Drive Problems 99
- Keyboard or Mouse Problems 99
- Memory Problems 100
- USB Device Problems 100
- PC Card Problems 101
- Power Failures 101
- Shutdown and Startup Problems 104
- Video Problems 105
- Miscellaneous Problems 107
- *Operating system not found 110
- *Parity Check 2 nnnn 110
- *Keyboard error nn 110
- Reboot your system 116
- Recovery and Utility tabs 119
- Check for updates now 120
- Show update history 120
- About Fujitsu Driver Update 120
- Fujitsu Driver Update Readme 120
- Care and Maintenance 121
- 1 Tur n it o ff 122
- - Care and Maintenance 123
- Caring for your Batteries 124
- Increasing Battery Life 125
- Caring for your Cards 127
- System Specifications 128
- System Memory 129
- Cache Memory 129
- Video Color and Resolution 129
- Video RAM 130
- Hard Drive 130
- Integrated Pointing Device 130
- Communications 130
- Trusted Platform Module 131
- Theft Prevention Lock 131
- On the LifeBook notebook: 131
- - Specifications 132
- Microsoft OneNote 137
- EverNote 137
- Operating System Options 137
- Microsoft Works 8.5 137
- Glossary 138
- - Glossary 139
- IEEE802.11g 145
- Infrared 145
- Infrastructure 145
- IP Address 145
- Megahertz 147
- Regulatory Information 154
- - Regulatory Information 155
- Export restrictions 161
- Canadian Notice 161
- Ad Hoc Mode 163
- How to Handle This Device 165
- WLAN/Bluetooth Switch 166
- Configuring the Wireless LAN 167
- Connection to the network 168
- Troubleshooting the WLAN 169
- (continued) 170
- Item Specification 171
- WLAN Specifications 172
- Using the Bluetooth Device 173
- Warranty 174
- Fingerprint 175
- Sensor Device 175
- System Requirements 176
- SYSTEM 177
- User Enrollment 178
- Master Password Concept 179
- Enrolling a Fingerprint 181
- Password Replacement 182
- Remembering a Password 182
- Associating a Friendly Name 183
- With Master Password 184
- Password Management 185
- OmniPass User Identities 186
- Switch User Identity 187
- IN OMNIPASS 188
- User Management 190
- User Settings 191
- System Settings 191
- Index 194
Indice de contenidos
User’s GuideLearn how to use your Fujitsu LifeBook T2010 notebook
10 Chapter 5 Care and MaintenanceCaring for your LifeBook Notebook . . . . . . . . . . . . . . . . . . . . . . . . . . . . . . 121Cleaning your LifeB
100 - Troubleshooting Your LifeBookYou have connected an external keyboard or a mouse and it seems to be locking up the system.Your operating system i
101 - Troubleshooting Your LifeBookYou have installed a USB device. Your LifeBook notebook does not recog-nize the device, or the device does not seem
102 - Troubleshooting Your LifeBookYou turn on your LifeBook notebook and nothing seems to happen. (continued)The battery is installed but is faulty.U
103 - Troubleshooting Your LifeBookYour LifeBook notebook turns off all by itself.(continued)You have a battery failure. Verify the condition of the b
104 - Troubleshooting Your LifeBookThe battery seems to discharge too quickly (continued)The battery has been exposed to high tempera-tures.Replace t
105 - Troubleshooting Your LifeBookYour notebook appears to change setup parameters when you start it.BIOS setup changes were not saved when made and
106 - Troubleshooting Your LifeBookThe display goes blank by itself after you have been using it.The notebook has gone into Video timeout, Standby mod
107 - Troubleshooting Your LifeBookThe Display is dark when on battery power.The Power Management util-ity default is set on low bright-ness to conser
108 - Troubleshooting Your LifeBookPower On Self Test MessagesThe following is an alphabetic list of error-and-status messages that Phoenix BIOS and/o
109 - Troubleshooting Your LifeBook*Fixed Disk x Failure or Fixed Disk Controller Failure (where x = 1-4) The fixed disk is not working or not config
11 Glossary/RegulatoryGlossary . . . . . . . . . . . . . . . . . . . . . . . . . . . . . . . . . . . . . . . . . . . . . . . . . . . . . 138Regulator
110 - Troubleshooting Your LifeBook*Keyboard error nn BIOS discovered a stuck key and displays the scan code for the stuck key. You may have to replac
111 - Troubleshooting Your LifeBook*Press <F1> to resume, <F2> to SETUP Displayed after any recoverable error message. Press the [F1] key
112 - Troubleshooting Your LifeBook*System CMOS checksum bad – run SETUP BIOS CMOS RAM has been corrupted or modified incorrectly, perhaps by an appli
113 - Restoring Your Pre-installed SoftwareRestoring Your Pre-installed SoftwareThe Drivers and Applications Restore (DAR) DVD contains sets of device
114 - Restoring Your Pre-installed Software4 In the list, check off all the components you want to install. If you want to install all components, cli
115 - Restoring Your Pre-installed SoftwareBOOT Priority Change Before restoring an image, you must first verify that the system is set up to boot fro
116 - Restoring Your Pre-installed SoftwareProcedure 1 Turn on the power to your system.2 Ensure that you have a device that can read DVDs either inst
117 - Restoring Your Pre-installed SoftwareIn order to determine the method for accessing the Recovery and Utility applet, perform the following proc
118 - Restoring Your Pre-installed SoftwareBOOT Priority Change Before restoring an image, you must first verify that the system is set up to boot fro
119 - Restoring Your Pre-installed Software3 Insert the Recovery and Utility disc into the drive tray. With the boot priority set in the procedure abo
12 Appendix B: Fingerprint Sensor DeviceIntroducing the Fingerprint Sensor Device . . . . . . . . . . . . . . . . . . . . . . . . 175Getting Started
120 - Restoring Your Pre-installed SoftwareThe FDU icon should appear in the system tray at the bottom right of your screen (roll the cursor over the
121 Chapter 5 Care and MaintenanceCaring for your LifeBook NotebookIf you use your Fujitsu LifeBook notebook carefully, you will increase
122 - Care and Maintenance• Your LifeBook notebook is a durable but sensitive electronic device. Treat it with respect and care.• Make a habit of tran
123 - Care and MaintenanceCleaning your LifeBook notebook• Always disconnect the power plug. (Pull the plug, not the cord.)• Clean your LifeBook noteb
124 - Care and Maintenance• Take the necessary plug adapters if you're traveling overseas. Check the following diagram to determine which plug ad
125 - Care and Maintenance• Do not drop, puncture, disassemble, mutilate or incinerate the battery.• Recharge batteries only as described in this manu
126 - Care and Maintenance• Do not bend media discs or set heavy objects on them.• Do not spill liquids on media discs.• Do not scratch media discs.•
127 - Care and MaintenancePC CardsCaring for your Cards PC Cards are durable, but you must treat them with care. The documentation supplied with your
128 Chapter 6 System SpecificationsSpecificationsThis section provides the hardware and environmental specifications for your Fujitsu Lif
129 - SpecificationsMicroprocessorIntel® Core™ 2 Duo Ultra Low Voltage processors (Refer to the system label to determine the speed of your processor)
13 PrefaceAbout This GuideThe LifeBook T2010 notebook from Fujitsu Computer Systems Corporation is a powerful convertible computer. It can be u
130 - SpecificationsVideo RAM Intel® Graphics Media Accelerator X3100 video graphics. Up to 384 MB shared video memory using Dynamic Video Memory Tech
131 - SpecificationsTrusted Platform Module The LifeBook T2010 has a Trusted Platform Module (TPM) installed for added system security.LifeBook Securi
132 - Specifications• One stereo headphone jack • One stereo microphone/line-in jack• Dedicated Smart Card slot (requires third-party application)• Wi
133 - SpecificationsPowerBatteries • Standard Lithium ion battery, rechargeable, 6-cell 10.8V, 5800 mAh, or,• High capacity 9-cell Lithium ion battery
134 - SpecificationsPopular AccessoriesFor ordering or additional information on Fujitsu accessories please visit our Web site at www.shopfujitsu.com
135 - SpecificationsLearning About Your SoftwareTutorials All operating systems and most application software have tutorials built into them upon inst
136 - SpecificationsCyberLink PowerDVD (Available with some configurations of the optional port replicator). PowerDVD from CyberLink is a versatile DV
137 - SpecificationsMicrosoft OneNote OneNote lets you collect all of your notes and information in an electronic “notebook” so that you can organize
138 GlossaryAC Adapter A device which converts the AC voltage from a wall outlet to the DC voltage needed to power your LifeBook notebook.Acces
139 - GlossaryAsymmetric Digital Subscriber Line. Technology for transporting high bit-rate services over ordinary phone lines.AGP Accelerated Graphic
14 - About This GuideFujitsu Contact InformationService and Support You can contact Fujitsu Service and Support in the following ways:• Toll free: 1-8
140 - GlossaryBus An electrical circuit which passes data between the CPU and the sub-assemblies inside your LifeBook notebook.Byte 8 bits of parallel
141 - GlossaryCOM Port Abbreviation for communication port. This is your serial interface connection.Command An instruction which you give your operat
142 - GlossaryDIMM Dual-in-line memory module.Disk A spinning platter of magnetic data storage media. If the platter is very stiff it is a hard drive,
143 - GlossaryDOS Disk Operating System (MS-DOS is a Microsoft Disk Operating System).Driver A computer program which converts application and operati
144 - GlossaryFloppy Disk A spinning platter of magnetic data storage media which is highly flexible.GB Gigabyte. One billion bytes.Hard drive A spinn
145 - GlossaryIEEE802.11g Wireless LAN standard that supports a maximum data rate of 54 Mbps. 802.11g devices operate in the 2.4 GHz ISM band. Infrare
146 - GlossaryIR An abbreviation for infrared.IrDA Infrared Data Association. An organization which produces standards for communication using infrare
147 - GlossaryMAC Address Media Access Control Address. A unique physical address of a network card. For Ethernet, the first three bytes are used as
148 - GlossaryMTU Maximum Transmission UnitThe maximum data size that can be transferred at a time through the Internet or other networks. You can set
149 - GlossaryPartition A block of space on a hard drive which is set aside and made to appear to the operating system as if it were a separate disk,
15 - About This Guide• Purchase date• Conditions under which the problem occurred• Any error messages that have occurred• Type of device connected, if
150 - GlossaryProgram An integrated set of coded commands to your computers telling your hardware what to do and how and when to do it.Protocol Proced
151 - GlossaryROM Read Only Memory. A form of memory in which information is stored by physically altering the material. Data stored in this way can n
152 - GlossaryStatus Indicator A display which reports the condition of some portion of your hardware. On your LifeBook notebook this is an LCD screen
153 - GlossaryTFT Thin Film Transistor – A technology for flat display panels which uses a thin film matrix of transistors to control each pixel of th
154 - Regulatory InformationRegulatory InformationNoticeChanges or modifications not expressly approved by Fujitsu could void this user’s authority to
155 - Regulatory InformationNotice to Users of the US Telephone Network This equipment complies with Part 68 of the FCC rules, and the requirements ad
156 - Regulatory InformationThe equipment cannot be used on public coin service provided by the telephone company. Connection to party line service is
157 - Regulatory InformationBefore connecting this equipment to a telephone line the user should ensure that it is permissible to connect this equipme
158 - Regulatory Information Avant de connecter cet équipement à une ligne téléphonique, l’utilisateur doit vérifier s’il est permis de connecter cet
159 Appendix A: WLAN User’s Guide FCC Regulatory InformationPlease note the following regulatory information related to the optional wireless L
16 Chapter 1 Getting to Know Your LifeBookOverviewThis section describes the components of your Fujitsu LifeBook T2010 notebook. We stron
160 Regulatory Information/Disclaimers Installation and use of this Wireless LAN device must be in strict accordance with the instructions included in
161 FCC Radio Frequency Exposure statement The available scientific evidence does not show that any health problems are associated with using low powe
162 Before Using the Optional Wireless LANBefore Using the Optional Wireless LANThis manual describes the procedures required to properly set up and c
163 Before Using the Optional Wireless LANWireless LAN Modes Using this DeviceAd Hoc Mode "Ad Hoc Mode" refers to a wireless network archite
164 Before Using the Optional Wireless LANAccess Point (Infrastructure) Mode Infrastructure mode refers to a wireless network architecture in which d
165 Before Using the Optional Wireless LANHow to Handle This Device The WLAN device is an optional device that may come pre-installed in your mobile c
166 Before Using the Optional Wireless LANDeactivation Using the Wireless On/Off SwitchThe WLAN device can be deactivated quickly and efficiently by t
167 Configuring the Wireless LANConfiguring the Wireless LANThe optional WLAN device can be configured to establish wireless network connectivity usin
168 Configuring the Wireless LANConfiguring the WLAN Using Windows XP Procedure 1 Click the Start button, then select Control Panel.2 If the Control P
169 Troubleshooting the WLANTroubleshooting the WLANTroubleshootingCauses and countermeasures for troubles you may encounter while using your wireless
17 - Locating the Controls and ConnectorsLocating the Controls and ConnectorsConnectors and peripheral interfaces on the LifeBook T2010 notebook and t
170 Troubleshooting the WLANUnavailable network connection(continued)The computer to be connected is turned offCheck if the computer to be connected
171 WLAN SpecificationsWLAN SpecificationsSpecificationsItem SpecificationType of network The Intel PRO/Wireless 4965AGN Network Connections WLAN dev
172 WLAN Specifications* “Wi-Fi based” indicates that the interconnectivity test of the organization which guarantees the interconnectivity of wire
173 Using the Bluetooth DeviceUsing the Bluetooth DeviceThe Integrated Bluetooth module (EYTF3CSFT) is an optional device available for Fujitsu mobile
174 Using the Bluetooth DeviceFCC Radiation Exposure Statement This equipment complies with FCC radiation exposure limits set forth for an uncontrolle
175 Appendix B: Fingerprint Sensor DeviceIntroducing the Fingerprint Sensor DeviceYour system has a fingerprint sensor device at the bottom lef
176 - Introducing the Fingerprint Sensor DeviceAfter you have “enrolled” - or registered - your fingerprint, you can simply swipe your fingertip over
177 - Introducing the Fingerprint Sensor Device• Windows XP Professional operating system• At least 35 MB available hard disk spaceInstalling the Omni
178 - Introducing the Fingerprint Sensor Device1 From the Windows Desktop, double-click the key-shaped OmniPass icon in the taskbar (usually located i
179 - Introducing the Fingerprint Sensor DeviceMaster Password Concept Computer resources are often protected with passwords. Whether you are logging
18 - Locating the Controls and ConnectorsDock port Connect the notebook port replicator or other approved docking device. Refer to documentation accom
180 - Introducing the Fingerprint Sensor DeviceBasic Enrollment The Enrollment Wizard will guide you through the process of enrolling a user. Unless y
181 - Introducing the Fingerprint Sensor DeviceEnrolling a Fingerprint Enrolling a fingerprint will increase the security of your system and streamlin
182 - Introducing the Fingerprint Sensor DeviceUsing OmniPassYou are now ready to begin using OmniPass. Used regularly, OmniPass will streamline your
183 - Introducing the Fingerprint Sensor DeviceUsing the following procedure, you can store a set of credentials into OmniPass. These credentials will
184 - Introducing the Fingerprint Sensor DeviceIf you uncheck both boxes in Settings for this Password Site, OmniPass will prompt you for your master
185 - Introducing the Fingerprint Sensor DeviceLogging into Windows with a Fingerprint Device When logging into Windows with a fingerprint device, the
186 - Introducing the Fingerprint Sensor DeviceThe two check boxes in Manage Passwords govern whether OmniPass prompts you to authenticate or directly
187 - Introducing the Fingerprint Sensor DeviceTo set the default identity, highlight the identity you want as default and click [Set as Default]; cli
188 - Introducing the Fingerprint Sensor DeviceConfiguring OmniPassThis section gives an overview of both the Export/Import function and the OmniPass
189 - Introducing the Fingerprint Sensor DeviceThis .opi file contains all your user specific OmniPass data, and it is both encrypted and password pro
19 - Locating the Controls and ConnectorsFigure 2. LifeBook notebook with display openDisplay PanelStatus SpeakerKeyboardLifeBook Security/Power/Sus
190 - Introducing the Fingerprint Sensor DeviceOmniPass Control CenterThis section will serve to explain functions within the OmniPass Control Center
191 - Introducing the Fingerprint Sensor DeviceUser Settings The User Settings tab has four interfaces: Audio Settings, Taskbar Tips, and Enrollment.
192 - Introducing the Fingerprint Sensor DeviceTroubleshootingYou cannot use OmniPass to create Windows users. You must first create the Windows user,
193 - Introducing the Fingerprint Sensor DeviceIf you are having difficulties due to the first reason, you will need to update OmniPass with your chan
194 IndexAAbout This Guide 1, 13ACadapter 62plug adapters 124Air Vents 27, 29Anti-theft lock slot 27Auto/Airline Adapter 62Automatically Downlo
195 Display Panel 20, 32brightness 34opening 33problems 105, 106Dock port 18Docking Port 89Double-Clicking 40Dragging 41Drivers and Application Restor
196 KKeyboard 20, 36cursor keys 37function keys 37numeric keypad 37problems 99windows keys 37LLeft Button 21LifeBook Security Paneloperating 56passwor
197 AC adapter 61Auto/Airline adapter 61failure 101, 102management 71off 75on 63problems 104sources 61Power Management 71Power On Self Test 63, 108Pow
198 Tablet PC Button Functionschanging 53Touch Screen 42calibrating 44clicking 43dragging 44Troubleshooting 94UUniversal Serial Bus Ports 90USB 90, 10
Copyright and Trademark InformationFujitsu Computer Systems Corporation has made every effort to ensure the accuracy and completeness of this d
20 - Locating the Controls and ConnectorsTop ComponentsThe following is a brief description of your LifeBook notebook’s top components. Display Panel
21 - Locating the Controls and ConnectorsScroll Button The scroll button is used in conjunction with the Quick Point cursor control to navigate throug
22 - Locating the Controls and ConnectorsFigure 3. LifeBook notebook left-side panelLeft-Side Panel ComponentsThe following is a brief description of
23 - Locating the Controls and ConnectorsSmart Card Slot A dedicated Smart Card slot is provided on your notebook. Smart Cards are the same size and s
24 - Locating the Controls and ConnectorsFigure 4. LifeBook notebook right-side panel Right-Side Panel ComponentsThe following is a brief descriptio
25 - Locating the Controls and ConnectorsIEEE 1394 (4-pin) Jack The 4-pin 1394 jack is used to connect between your notebook and an IEEE 1394 peripher
26 - Locating the Controls and ConnectorsFigure 5. LifeBook notebook back panelBack Panel ComponentsFollowing is a brief description of your LifeBook
27 - Locating the Controls and ConnectorsAir Vents The air vents allow air to circulate through the system to cool down the components. Anti-theft Loc
28 - Locating the Controls and ConnectorsFigure 6. LifeBook notebook bottom panelBottom ComponentsThe following is a brief description of your LifeBo
29 - Locating the Controls and ConnectorsAir Vents The air vents allow air to circulate through the system to cool down the components. Memory Upgrade
© Copyright 2007 Fujitsu Computer Systems Corporation. All rights reserved. No part of this publication may be copied, reproduced, or translated, with
30 - Status Indicator PanelFigure 7. Status Indicator PanelStatus Indicator PanelThe Status Indicator displays symbols that correspond to a specific
31 - Status Indicator Panel Hard Drive Access IndicatorThe Hard Drive Access indicator shows whether your internal hard drive is being accessed. NumLk
32 - Display PanelFigure 8. Opening the Display PanelDisplay PanelYour LifeBook T2010 notebook contains an LED display panel that is backlit for easi
33 - Display PanelOpening the Display PanelLift the display backwards, being careful not to touch the screen with your fingers, until it is at a comfo
34 - Display PanelAdjusting Display Panel BrightnessOnce you have turned on your Tablet PC, you may want to adjust the brightness level of the screen
35 - Display PanelUsing Power Management to Adjust Brightness To adjust brightness with the power management utility,:Windows XP: Click Start -> Co
36 - KeyboardKeyboardFigure 12. KeyboardUsing the KeyboardYour Fujitsu LifeBook notebook has an integral 84-key keyboard. The keys perform all the st
37 - Keyboard• Numeric keypad: Your notebook allows certain keys to serve dual purposes, both as standard characters and as numeric and mathematical k
38 - KeyboardFunction Keys Your LifeBook notebook has 12 function keys, F1 through F12. The functions assigned to these keys differ for each applicati
39 - Quick Point Pointing Device/Touch ScreenQuick Point Pointing Device/Touch ScreenFigure 13. Touchpad pointing deviceThe Quick Point is built into
IMPORTANT SAFETY INSTRUCTIONS This unit requires an AC adapter to operate. Use only UL Listed I.T.E. Class II Adapters with an output rating of 16 VDC
40 - Quick Point Pointing Device/Touch ScreenClickingClicking means pushing and releasing a button. To left-click, move the cursor to the item you wis
41 - Quick Point Pointing Device/Touch ScreenDraggingDragging means pressing and holding the left button, while moving the cursor. To drag, move the c
42 - Quick Point Pointing Device/Touch ScreenQuick Point Control AdjustmentThe Windows Control Panel allows you to customize your Quick Point with sel
43 - Quick Point Pointing Device/Touch ScreenClicking on Touch ScreenTo left-click, touch the object you wish to select and then lift the stylus tip i
44 - Quick Point Pointing Device/Touch ScreenCalibrating the Touch ScreenIn order to ensure accurate tracking between the stylus and cursor, you must
45 - Quick Point Pointing Device/Touch ScreenTo run the calibration utility:1 Go to Start -> Control Panel. If you are not in Classic View, select
46 - Quick Point Pointing Device/Touch Screen2 Attach the end of the pen tether with the larger loop to the attachment point on your tablet. To do so,
47 - Volume ControlVolume ControlYour Fujitsu LifeBook notebook has multiple volume controls which interact with each other. Controlling the VolumeThe
48 - LifeBook Security/Tablet PC ButtonsFigure 14. LifeBook T2010 Notebook Security/Tablet PC Buttons LifeBook Security/Tablet PC ButtonsA unique fe
49 - LifeBook Security/Tablet PC ButtonsPre-logon button functionsAll five buttons can be used before logging on to Windows (i.e., the Windows logon s
Recycling your battery Over time, the batteries that run your mobile computer will begin to hold a charge for a shorter amount of time; this is a natu
50 - LifeBook Security/Tablet PC ButtonsTable 2. Pre-logon Tablet PC Button FunctionsWhen you press the [Fn] button then press and release the [Page
51 - LifeBook Security/Tablet PC Buttons When you press the [Screen Rotation] button when the system is in pre-boot, the system screen orientation cha
52 - LifeBook Security/Tablet PC ButtonsFunction / Fujitsu Menu Utility Button The [Function] button works in conjunction with the other application b
53 - LifeBook Security/Tablet PC ButtonsWhen the system is changed to tablet configuration, the orientation automatically changes to portrait mode by
54 - LifeBook Security/Tablet PC ButtonsWindows XP:1 Double-click on the Tablet and Pen Settings icon in the Control Panel. 2 Select the Tablet Button
55 - LifeBook Security/Tablet PC ButtonsPasswordsThe user and supervisor password may be set on this notebook. A supervisor password is typically the
56 - LifeBook Security/Tablet PC ButtonsSetting Supervisor Password You must have set a supervisor password before setting any user passwords. The sup
57 - LifeBook Security/Tablet PC ButtonsFrom Standby/Hibernation State 1 Press your Suspend/Resume button.2 When the Security Indicator flashes, enter
58 - LifeBook Security/Tablet PC ButtonsWindows Vista systems:To change the default for Windows Vista systems when the cover is closed:1 Open the syst
59 - LifeBook Security/Tablet PC ButtonsRemoving Security Panel Application with Passwords Still Active Using this feature will not allow any changes
ContentsPrefaceAbout This Guide . . . . . . . . . . . . . . . . . . . . . . . . . . . . . . . . . . . . . . . . . . . . . 13Conventions Used in
60 - LifeBook Security/Tablet PC Buttons4 When User Account Control box appears, click Continue.Supervisor:1 Go to Start -> Control Panel.2 Open Ad
61 Chapter 2 Getting Started with Your LifeBookFigure 15. Connecting the AC AdapterPower SourcesYour Fujitsu LifeBook notebook has three
62 - Power SourcesConnecting the Power AdaptersThe AC adapter or optional Auto/Airline adapter provides power for operating your notebook and charging
63 - Starting Your LifeBook NotebookStarting Your LifeBook NotebookPower OnPower/Suspend/Resume Button The Power/Suspend/Resume button is used to turn
64 - Starting Your LifeBook NotebookBoot SequenceThe procedure for starting-up your notebook is termed the Bootup sequence and involves your notebook’
65 - Starting Your LifeBook NotebookBIOS Setup UtilityThe BIOS Setup Utility is a program that sets up the operating environment for your LifeBook not
66 - Starting Your LifeBook NotebookThe TrustedCore Menu provides shortcuts to the following menus and information screens: • BIOS Setup• Diagnostic S
67 - Starting Your LifeBook NotebookStarting Windows Vista the first timeIn order to ensure that you receive the most benefits from the Windows Vista
68 - Starting Your LifeBook Notebook8 Windows will then boot up for the first time. As noted above, the first time you initialize your Windows Vista s
69 - Starting Your LifeBook NotebookSeveral additional windows will appear, prompting you to enter a name and description for your computer, an Admini
7 Display Panel . . . . . . . . . . . . . . . . . . . . . . . . . . . . . . . . . . . . . . . . . . . . . . . . . 32Opening the Display Panel . . . .
70 - Starting Your LifeBook NotebookControl” window, you will be asked for your permission to continue. Click [Continue] to continue. If you cancel th
71 - Power ManagementPower ManagementYour Fujitsu LifeBook notebook has many options and features for conserving battery power. Some of these features
72 - Power ManagementStandby (Sleep) ModeStandby (Sleep) mode in Windows saves the contents of your system memory during periods of inactivity by main
73 - Power ManagementHibernation (Save-to-Disk) FeatureThe Hibernation feature saves the contents of your notebook’s system memory to the hard drive a
74 - Power ManagementWindows XP:The default settings are not enabled. To enable or disable the Hibernation feature follow these steps:1 From the Start
75 - Power ManagementPowering OffBefore turning off the power, check that the hard drive/optical drive access indicator is off. If you turn off the po
76 Chapter 3 User-Installable FeaturesLithium ion BatteryYour LifeBook notebook has a Lithium ion battery that provides power for operati
77 - Lithium ion BatteryRecharging the BatteriesIf you want to know the condition of the primary Lithium ion battery, check the Battery Level indicato
78 - Lithium ion BatteryLow Battery State When the battery is running low, a low battery notification message will appear. If you do not respond to th
79 - Lithium ion BatteryShorted Batteries The Status Indicator panel indicator associated with the Battery Level indicator displays the operating leve
8 Chapter 2 Getting Started with Your LifeBookPower Sources . . . . . . . . . . . . . . . . . . . . . . . . . . . . . . . . . . . . . . . . . . . . .
80 - Lithium ion BatteryFigure 16. Removing a Battery2 Follow steps 3 through 6 in “Cold Swapping Batteries”. Battery Bay Release LatchesBattery Pack
81 - Memory Stick/Secure Digital CardsFigure 17. Installing a Memory Stick or SD CardMemory Stick/Secure Digital CardsYour LifeBook notebook supports
82 - Memory Stick/Secure Digital CardsInstalling Memory Stick/SD CardsMemory Stick and SD Cards are installed in the Memory Stick/SD Card slot. To ins
83 - PC CardsFigure 18. Installing/Removing PC CardPC CardsYour LifeBook notebook supports Type I and Type II PC Cards which can perform a variety of
84 - PC CardsInstalling PC CardsTo install a PC Card in the PC Card slot, follow these steps: 1 See your PC Card manual for instructions on the instal
85 - PC Cards1 Unlock the card from the slot by pressing the eject button associated with the slot in which the card is located. When pressed, the but
86 - Memory Upgrade ModuleMemory Upgrade ModuleYour Fujitsu LifeBook notebook comes with a minimum of 512 MB of high speed Double Data Rate Synchronou
87 - Memory Upgrade Module7 Insert the memory upgrade module at a 45° angle. Press the connector edge of the module firmly down and into the connector
88 - Memory Upgrade ModuleRemoving a Memory Upgrade Module1 Perform steps 1 through 4 of Installing a Memory Upgrade Module.2 Pull the clips sideways
89 - Device PortsDevice PortsYour Fujitsu LifeBook notebook and the optional Port Replicator come equipped with multiple ports to which you can connec
9 PC Cards . . . . . . . . . . . . . . . . . . . . . . . . . . . . . . . . . . . . . . . . . . . . . . . . . . . . 83Installing PC Cards. . . . . . .
90 - Device PortsUniversal Serial Bus PortsThe Universal Serial Bus 2.0 ports (USB) allow you to connect USB devices such as external game pads, point
91 - Device PortsIEEE 1394 PortThe 4-pin 1394 port allows you to connect digital devices that are compliant with IEEE 1394 standard. The IEEE 1394 sta
92 - Device PortsHeadphone JackThe headphone jack allows you to connect headphones or powered external speakers to your notebook. Your headphones or s
93 - Device PortsFigure 25. Connecting an External Video Device
94 Chapter 4 Troubleshooting Your LifeBookTroubleshootingThere may be occasions when you encounter simple setup or operating problems tha
95 - Troubleshooting Your LifeBook7 If the problem has not been resolved, refer to the Troubleshooting Table, that follows, for more detailed troubles
96 - Troubleshooting Your LifeBookSpecific ProblemsUsing the Troubleshooting Table When you have problems with your LifeBook notebook, try to find the
97 - Troubleshooting Your LifeBookProblem Possible Cause Possible SolutionsAudio ProblemsThere is no sound coming from the built-in speaker.The volume
98 - Troubleshooting Your LifeBookLifeBook notebook fails to recognize DVD/CD-RW/CD-ROM’s.(continued)Optical drive tray is not latched shut.Push on th
99 - Troubleshooting Your LifeBookFloppy Disk Drive ProblemsYou cannot access your optional external floppy disk.You tried to write to a write protect
Mas documentos para Televisores y monitores Sharp LL-T2010
Relacionado con productos y manuales para Televisores y monitores Sharp LL-T2010
 (50 paginas)
 (4 paginas)
© 2020, manymanuals.es. Todos los derechos reservados | 0.028 s |
 Manymanuals.com
 Manymanuals.de
 Manymanuals.fr
 Manymanuals.it
 Manymanuals.pl
 Manymanuals.cz
 Manymanuals.es
 Manymanuals-pt.com
Comentarios a estos manuales